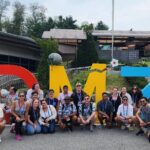
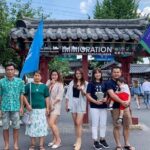
REVIEW · SEOUL
DMZ Guided Tour with Suspension Bridge / Gondola from Seoul
Book on Viator →Operated by Korea Time Tour · Bookable on Viator
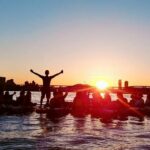
The DMZ turns history into real distance. This guided day trip takes you from Seoul into the Demilitarized Zone, then on to Dora Observatory and tunnel sites, where the Korean War story stops being abstract. On clear days, you may even get a view toward North Korea, plus you can add a suspension bridge or gondola for photos and perspective.
Two things I really like: first, you don’t have to play transportation planner. You ride in an air-conditioned vehicle with round-trip transfers and an English-speaking guide/driver, so your time goes into the stops, not logistics. Second, the day is built around major “show-and-tell” landmarks, from the Dora area to the tunnels, with admission tickets handled.
One drawback to keep in mind: the experience depends on weather and visibility, and the tunnel portion includes real walking and stairs. If you have heart disease, leg/back issues, or respiratory problems, you may not be able to enter the Third Tunnel, and fog can limit what you can see.
In This Review
- Key highlights worth factoring in
- Why this DMZ tour feels different from a classroom history lesson
- Price and what $35 really buys you (and what it does not)
- The day’s rhythm: timed entries, tunnel hiking, and why Monday matters
- Stop 1: DMZ time—standing in the buffer zone (and why 2 hours helps)
- The Third Tunnel (Tue–Sun): narrow, steep, and not for everyone
- Dora Observatory and Dorasan Station: your best shot at seeing North Korea
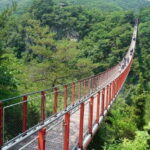
- Stop 4: Gamaksan Chulleong Bridge and the suspension bridge option
- The Second Tunnel route (Mondays): longer, more stops, same tough terrain
- Optional meeting with a North Korean defector: powerful, not guaranteed
- What the guide really affects: Patrick, Roy, Ki, Andrew, and April in the mix
- Weather, fog, and political changes: the DMZ isn’t predictable
- Practical tips: how to avoid the common “I felt rushed” feeling
- Who should book this DMZ tour—and who should skip parts
- Should you book this DMZ Guided Tour with Suspension Bridge / Gondola?
- FAQ
- How long is the DMZ guided tour from Seoul?
- How much does the tour cost?
- What’s included in the tour price?
- Do I get to visit the Third Tunnel and Dora Observatory?
- Can I see North Korea during the tour?
- Is the gondola included, or is it optional?
- Is there a monorail on this tour?
- Are meals included?
- Is the Third Tunnel accessible for everyone?
- What happens if the tour is canceled due to weather or politics?
Key highlights worth factoring in
- Dora Observatory offers the best shot at a North Korea view when visibility is clear
- Third Tunnel vs Second Tunnel changes by day (Tue–Sun vs Monday)
- Optional gondola or suspension bridge keeps the day from feeling purely heavy
- Guides with big personality, including Patrick, Roy, Ki, Andrew, and April (when available)
- Strict timing matters because entry slots are tied to the schedule
Why this DMZ tour feels different from a classroom history lesson
A DMZ tour works because it turns maps into places. You’re not just hearing about the Korean Peninsula split; you’re standing in the buffer zone, looking at the infrastructure built around the conflict, and moving through sites that were engineered for military planning.
I also like that the day has both perspective and pacing. You’ll spend time at multiple stops instead of one long bus ride to a single viewpoint. That makes the story easier to follow—especially when your guide connects the dots between what you’re seeing at each place.
Finally, this is one of those rare tours where weather actually changes the outcome. If skies are clear, the Dora Observatory stop can feel eye-opening. If you get fog or low visibility, you still get the sites and the history, but the sightline part may be disappointing.
You can also read our reviews of more guided tours in Seoul


Price and what $35 really buys you (and what it does not)
At $35 per person, the value is strong for what you’re getting: round-trip transfers by air-conditioned vehicle, admission to the key sites, and an English-speaking guide/driver. Many Seoul tours that feel “cheap” quietly shift costs into add-ons; here, the core entrances are already part of the plan.
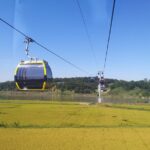
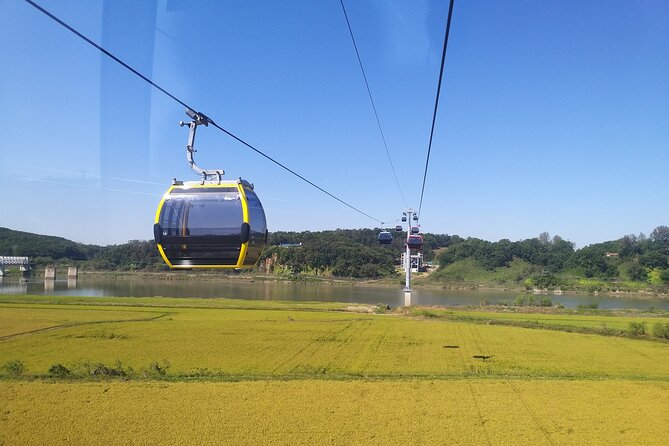
The part that’s not included is equally important. Meals and beverages are not included, and you’ll likely buy food on the day. Also, the gondola and suspension bridge are optional—so your final cost depends on whether you choose both or only one.
One more practical note: you get a mobile ticket. That usually makes check-in smoother, especially on a tour with timed entry points like the tunnels and observatory stops.
The day’s rhythm: timed entries, tunnel hiking, and why Monday matters
Expect a long day. It’s listed at about 7 to 11 hours, and that range usually reflects the day’s schedule plus traffic and weather conditions.
Plan for walking. The tour includes hiking for the tunnel experience, and the Third Tunnel specifically requires an intermediate level of hiking. Some people can feel it as steep down-and-up terrain, and if surfaces are wet it can be slippery. You can choose not to do the down-and-back path, but you’ll miss the tunnel visit portion that most people come for.
Also, your tunnel lineup changes by day:
- Mondays: you’ll go to the Second Tunnel route, plus Peace Observatory and Woljeongri train station, and a suspension bridge stop
- Tue–Sun: you’ll go to the Third Tunnel route, then Dora Observatory and other nearby stops, with gondola or suspension bridge options depending on what you picked
That schedule detail isn’t just trivia. It changes what you’ll physically do that day, how long the tunnel segment runs, and how the rest of your stops stack together.
Stop 1: DMZ time—standing in the buffer zone (and why 2 hours helps)
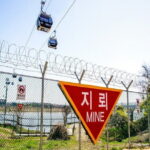
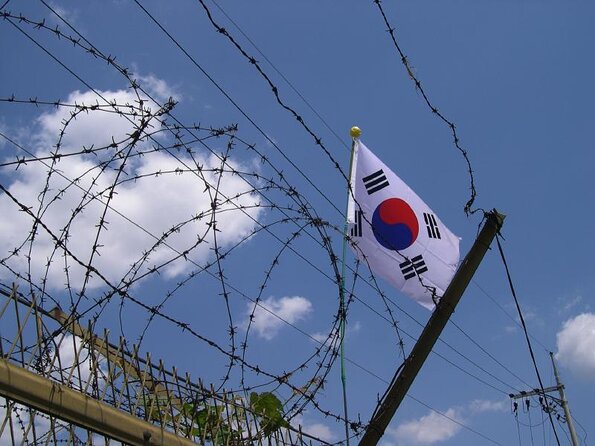
Your first big anchor is the DMZ itself. This is the buffer zone between North and South Korea, and it stretches about 248 km between Jeongdong-ri (Paju-si) and Myeongho-ri (Goseong-gun).
Spending about 2 hours here matters. It gives time to absorb the geography and what the DMZ represents beyond headlines. You’re not rushing through a single overlook; you’re getting the “big picture” before moving into the tunnel engineering and observation points.
What to watch for: your best understanding will come from paying attention to how the guide connects the physical boundaries to the political purpose. The DMZ tour works best when you treat it like guided field notes, not a photo stop.
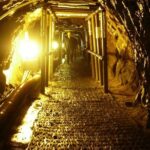
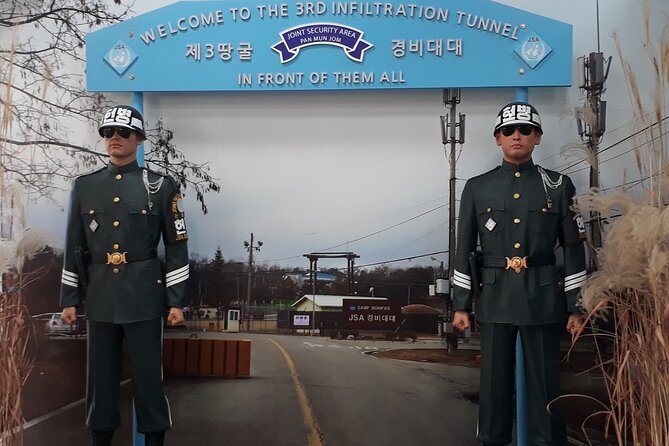
The Third Tunnel (Tue–Sun): narrow, steep, and not for everyone
If you tour Tue–Sun, the Third Tunnel is one of the hardest and most memorable stops. It was discovered by South Korea in 1978, and it’s about 1,635 meters long, with very tight dimensions (around 2 meters in width and height). It’s also listed as about 52 km from Seoul.
The tour time for this stop is about 1 hour, and that includes the tunnel experience. But don’t be fooled by the time. The Third Tunnel stop comes with the “real walking” requirement: heart disease/leg/back/respiratory issues can prevent entry, and it needs intermediate hiking.
Here’s what that means for you on the ground:
- You may need to go down and then return up with a steep grade
- People often describe it as tiring and a bit slippery depending on conditions
- If you’re not sure you can handle it, it’s worth preparing your decision early so you don’t stress during the rush of timed entry
If the Third Tunnel is unavailable for your day, the plan may switch to another destination. That’s still a disruption, but at least the tour isn’t left with nothing to do.


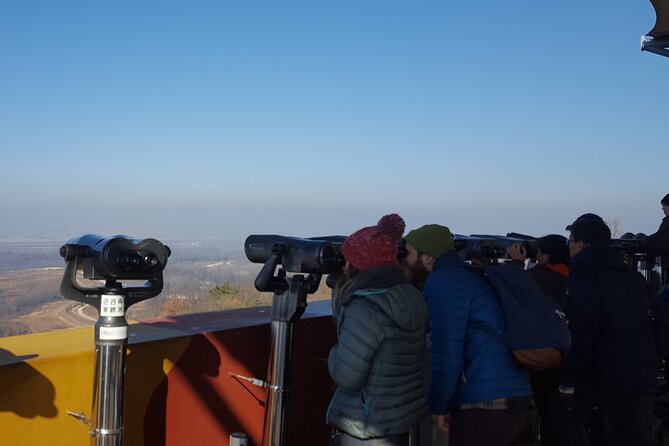
Dora Observatory and Dorasan Station: your best shot at seeing North Korea
Next comes the Dora Observatory area, and this is where the day can feel most intense. This stop is built around observation: on a clear day, visibility may let you see North Korea from the observatory.
Dora Observatory is paired with the Dorasan Station stop. Dorasan is described as the last station in South Korea, and the tour also includes a view direction toward Pyongyang from the observation context.
Timing here is key because weather rules the sightline. If you have fog, rain, or low cloud, your view may be limited. Still, even on a dull day, the observatory stop is valuable because it makes the separation feel immediate—you can see how close the peninsula is in reality, while the border remains impossible to cross.
Stop 4: Gamaksan Chulleong Bridge and the suspension bridge option
If you choose the suspension bridge option, you’ll add Gamaksan Chulleong Bridge near the DMZ area. The tour lists this as about 1 hour 30 minutes, and admission for this bridge stop is free.
This is the lighter-feeling break in the middle of heavy content. It’s a change of pace: you’re no longer in tunnel engineering mode or strict observation mode. You’re out at a vantage point that also helps you frame what the surrounding terrain looks like.
One practical tip: treat this as a photo stop, but don’t count on perfect weather. Wind and visibility can affect how the bridge looks in images, especially if your day starts with fog.
The Second Tunnel route (Mondays): longer, more stops, same tough terrain

On Mondays, the Third Tunnel doesn’t run. Instead, you’ll go to the Second Tunnel and then continue with extra stops.
That Monday sequence includes:
- Second Tunnel (about 3 hours total for this stretch, with admission included)
- Peace Observatory
- Woljeongri train station
- Suspension bridge time
Because the Second Tunnel route runs longer, Monday tours can feel more packed even if the early morning timing is similar. If you’re choosing between days, think about what you want most: the Third Tunnel is a major highlight for many people, while the Monday set gives you more variety at other DMZ-side landmarks.
Optional meeting with a North Korean defector: powerful, not guaranteed
The tour includes an optional meeting with a North Korean defector. That means it’s not guaranteed for every departure, but it is part of what the operator can include depending on the day’s situation.
If it happens, this kind of firsthand perspective can add a human layer to everything else you’re seeing. It doesn’t replace the sights, but it can shift how the whole day lands emotionally.
What the guide really affects: Patrick, Roy, Ki, Andrew, and April in the mix
On this kind of tour, your guide can make the difference between facts you forget and history that sticks. You may get different English-speaking guides, and the names I’ve seen attached to this experience include Patrick, Roy, Ki, Andrew, and April.
What tends to be praised is how they keep the day moving while still explaining what matters. That balance is tricky on the DMZ schedule, because timed entries leave little margin for wandering.
If your guide is sharp with pacing, you’ll feel like you’re getting the full story rather than being herded from one checkpoint to another. If timing goes off, it can feel rushed. So show up early, listen carefully at each stage, and treat their timing instructions like part of the tour, not optional advice.
Weather, fog, and political changes: the DMZ isn’t predictable
This tour can be canceled due to weather or political situation. If that happens, you’ll be offered a different date or a full refund.
Even when the tour runs, visibility can change the day’s emotional payoff. Many people come specifically hoping to see North Korea from the observatory, and fog can blunt that. Still, I think the tour remains worthwhile because the tunnels and DMZ context are the real backbone. The views are a bonus, not the only reason to go.
If you can, aim for a day with better weather. And if the forecast is shaky, keep your expectations flexible. Your photos can still be good, but your sightline may not behave.
Practical tips: how to avoid the common “I felt rushed” feeling
The tour runs on strict timing, especially around ticketed entry windows. A few simple habits help a lot:
- Get to the meeting point early so you’re not scrambling in a big group
- Wear comfortable shoes you can walk in for a while
- Bring a light layer even if Seoul feels warm, since conditions can shift
- If you opt into the gondola or suspension bridge, plan your energy so you’re not wiped out at the end
Also, meals and beverages aren’t included. You’ll want a strategy: either grab a snack before the tour starts or plan for a lunch stop where you can buy food. The day can stretch, and tunnel hiking eats energy fast.
Luggage matters too. The tour notes that you should discuss the size and number of your bags in advance if you plan to bring luggage.
Who should book this DMZ tour—and who should skip parts
This tour is a strong match if you:
- Want a guided DMZ experience with admissions handled
- Like structured itineraries and clear talking points
- Are curious about the practical geography of the Korean War era and how it affects today
It’s a tougher match if:
- You have heart disease, leg/back problems, or respiratory issues and want to enter the Third Tunnel
- You dislike steep grades and stairs, especially in wet or slippery conditions
- You’re not comfortable with a strict timetable and timed entry flow
If you’re unsure about fitness, don’t assume you can magically “push through.” The tunnel requirement is part of the real experience, and the tour explicitly limits access for certain health conditions.
Should you book this DMZ Guided Tour with Suspension Bridge / Gondola?
If you want the most efficient way to see the DMZ highlights from Seoul, I’d book it—especially at the $35 level where admissions and guide/vehicle are bundled. The itinerary covers the big emotional and educational anchors: DMZ time, tunnel access, and Dora Observatory with potential North Korea visibility on clear days.
Choose your options wisely. If you like photos and don’t mind extra movement, adding gondola or suspension bridge can make the day more balanced. If your priority is the tunnel and observatory, you can still do plenty without overloading on extras—just remember the day’s walking is already real.
My final advice: go on a day with better visibility if you can, show up early for strict timing, and pack for walking. If you do those things, you’ll come away with a clearer sense of the Korean Peninsula than any headline can provide.
FAQ
How long is the DMZ guided tour from Seoul?
It’s listed as about 7 to 11 hours, depending on the day’s schedule and conditions.
How much does the tour cost?
The price is $35.00 per person.
What’s included in the tour price?
You get an air-conditioned vehicle, admission to the attractions, an English-speaking tour guide/driver, and round-trip transfers. The gondola (cable car) and/or suspension bridge visit depends on the option you select.
Do I get to visit the Third Tunnel and Dora Observatory?
You visit the Third Tunnel and Dora Observatory on Tue–Sun. On Mondays, the tour focuses on the Second Tunnel route instead.
Can I see North Korea during the tour?
At Dora Observatory, you may be able to see North Korea if the weather and visibility are clear.
Is the gondola included, or is it optional?
It’s optional. When you book, you choose the gondola and/or suspension bridge option. You won’t get both automatically unless you selected both.
Is there a monorail on this tour?
No. The monorail is not available.
Are meals included?
No. Meals and beverages are not included, though you may have a stop during the day where you can purchase food.
Is the Third Tunnel accessible for everyone?
No. If you have heart disease, leg/back problems, or respiratory problems, you cannot enter the Third Tunnel. It also involves intermediate-level hiking.
What happens if the tour is canceled due to weather or politics?
If it’s canceled for weather or political situation, you’ll be offered a different date or a full refund.