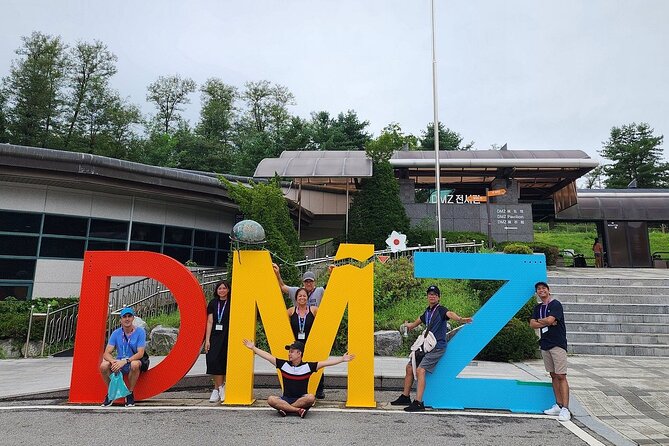
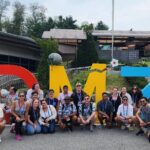
REVIEW · SEOUL
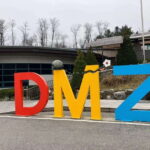
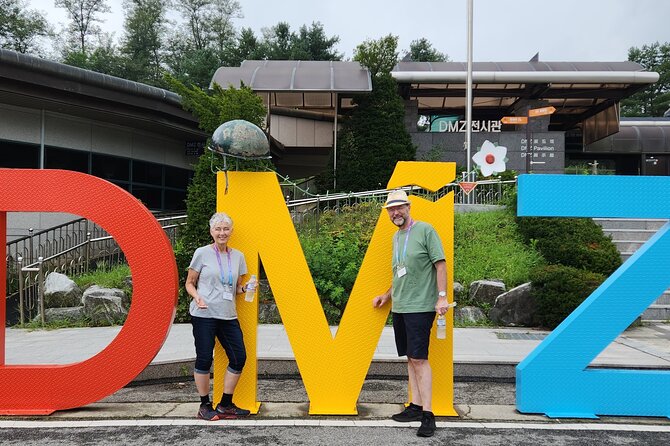
Thrilling Korean DMZ 3rd Tunnel Tour from Seoul + Red Bridge Rush
Book on Viator →Operated by VIP TRAVEL Co.Ltd · Bookable on Viator
Korean DMZ tours can feel like a history lesson. This one keeps you moving through the most visitable DMZ-adjacent stops, with real on-the-ground context and a guided route that helps you understand what you’re seeing.
I especially like the included admissions and the fact that you get a full day of commentary without having to puzzle out bus schedules or meeting points. I also love that the itinerary isn’t just one dramatic moment; it builds meaning stop by stop, from Imjingak to the Third Tunnel.
The main drawback is physical: the tunnel portion and the Red Bridge option can be strenuous, and the tour timing can shift due to DMZ access or military events.
In This Review
- Key things to know before you go
- Price and logistics: what $35 gets you (and what it doesn’t)
- Pickup points in Seoul: avoid the morning scramble
- The day’s backbone: Imjingak before you ever reach the DMZ tunnel
- Third Tunnel of Aggression: the hardest stop (and why it matters)
- Dora Observatory: closest views over North Korea, with limits
- Imjingak Park memorials: small stops that do heavy emotional work
- Optional peace-and-a-view time: Tongilchon Jangdankong Maeul
- Red Bridge Rush: Gamaksan Red Bridge is not for everyone
- Which guides make this tour shine (names people keep mentioning)
- What to pack and how to pace yourself
- Who should book this DMZ + Third Tunnel day
- Should you book this tour
- FAQ
- How long is the DMZ tour?
- Where do I meet for pickup?
- Do I need a passport?
- Is lunch included in the price?
- Can I take photos inside the Third Tunnel or from the observatory toward North Korea?
- Is the Red Bridge part optional?
Key things to know before you go
- Mobile ticket and planned pickups: You’ll meet at central Seoul subway exits or in the downtown hotel pickup zone.
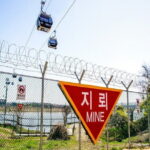
- DMZ access is not guaranteed in every way: If conditions change, the schedule can adjust.
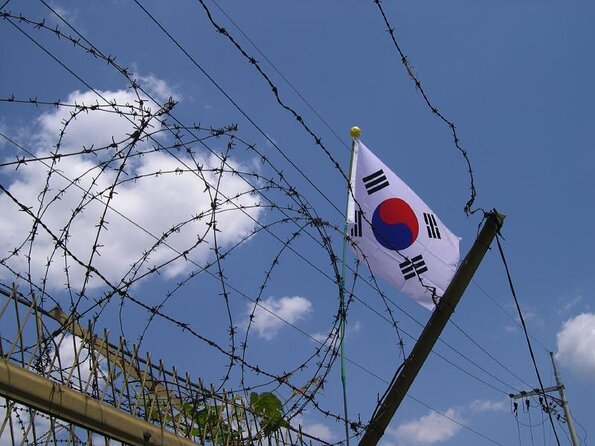
- The Third Tunnel is the star, and it’s hard work: Expect steep slopes, stairs-less walking, and strict rules (including no tunnel photos).
- Dora Observatory is close to the action, but views depend on weather: Even when visibility is good, North Korea is far.
- Red Bridge is optional, and it’s a hike: The Gamaksan Red Bridge can be a challenge if you’re not used to uphill walking.
- You may have some shop time: Don’t assume free time is purely sightseeing; plan to browse lightly and move on.
Price and logistics: what $35 gets you (and what it doesn’t)
This tour is priced at $35, and that low number matters because the DMZ day is usually expensive once you add transport, guide time, and admission fees. Here, the big value is that admissions are included across the stops where tickets apply, so you’re not constantly paying at counters while you’re already spending the day away from Seoul.
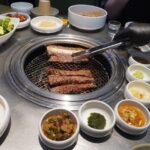
What’s not included is just as important: lunch isn’t provided, and you’ll be dropped in central Seoul (Hongdae, City Hall, or Myeongdong). That means you should think like a day-hiker on a sightseeing circuit: bring a light snack or plan to buy something at stops, because the day is structured and not built around a sit-down meal.
Also note the “tour time can be changed” reality. DMZ access rules can shift with military issues or events, and the operator explicitly warns you about this. It’s not panic; it’s just the nature of touring a restricted border zone.
You can also read our reviews of more tours and experiences in Seoul.

Pickup points in Seoul: avoid the morning scramble
You get three easy, central meeting locations: Myeongdong Station (Exit 9), Seoul City Hall Station (Exit 6), and Hongdae Station (Exit 3). If you qualify for hotel pickup, it’s only in the downtown area or at a main subway station, and pickup times can vary by your meeting point.
This matters because DMZ days punish delays. Your schedule is tightly connected to clearance and entry windows. If you’re arriving from far away, I’d rather you overestimate transit time and show up early than stress at the last minute.
Group size is capped at 150 travelers, so you should expect a busier experience than a private tour, but still organized. On the plus side, a larger group helps justify the guide coverage and keeps the day moving.
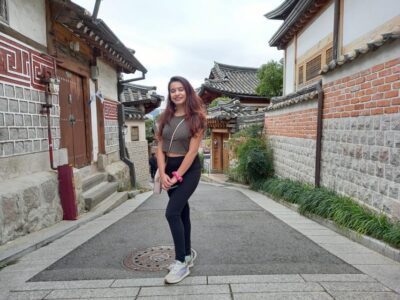
The day’s backbone: Imjingak before you ever reach the DMZ tunnel
The tour’s emotional setup starts at Imjingak Park. This is a small but meaningful area for people affected by the Korean division, and it functions like a preface: you learn the language of what you’ll see later. You also get a quick logistics step at Imjingak Resort where the guide handles entrance clearance and tickets to enter via the Unification Bridge.
Then you’ll see the Freedom Bridge (Bridge of Freedom), a historically significant crossing tied to prisoners of war in 1953. Even if you’ve read about the war before, standing near these reconstructed memorial spaces gives the story a physical scale. It’s one of those moments where history stops being a paragraph and becomes a place.
Right after that, the tour offers the Paju Imjingak Peace Gondola as an optional add-on. The idea is simple: get a better view from above while you’re still in the safe, DMZ-adjacent area. If you’re short on time or prefer walking less, you can skip it. If you like angles and photo-friendly vantage points (where allowed), it’s a nice extra.
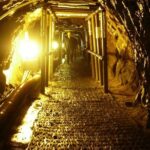
Third Tunnel of Aggression: the hardest stop (and why it matters)
The most dramatic part of the day is the Third Tunnel of Aggression, also called the 3rd Infiltration Tunnel. The tunnel’s history is chilling in a very practical way: it’s not just a memorial; it’s a real piece of hidden infrastructure uncovered in 1978. That concreteness is what makes this stop so memorable.
Here’s the reality check: the tunnel portion can be physically tough. One guide-led experience description notes a strenuous route, including a walk and a slope down and up again, plus time inside a low tunnel space. If you’re not comfortable with uphill walking or confined, low-clearance areas, this is the part that can push you.
Two additional rules can also shape your expectations:
- You can’t take photos inside the tunnel, for obvious restrictions in a controlled area.
- What you experience is mostly the tunnel itself. You’re there to understand how the tunnel system worked and what it symbolizes, not to enjoy a scenic walking loop.
If you’re planning for success, this is the moment to go in prepared: wear shoes with solid traction and pace yourself. The tour is time-managed, and the route is not designed for lingering.
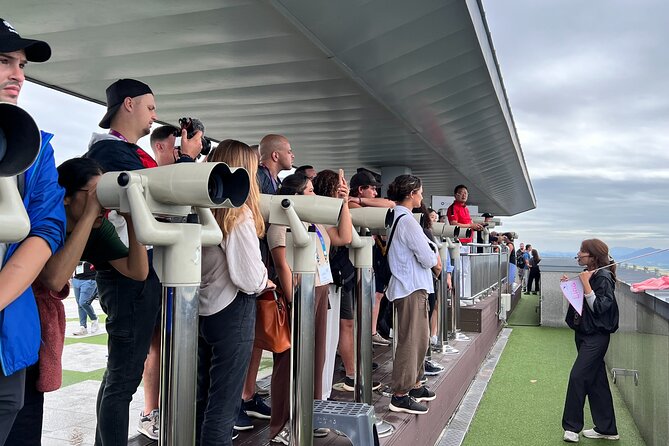
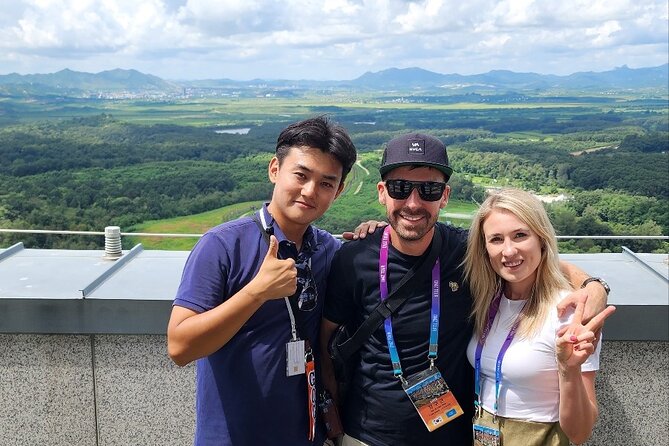
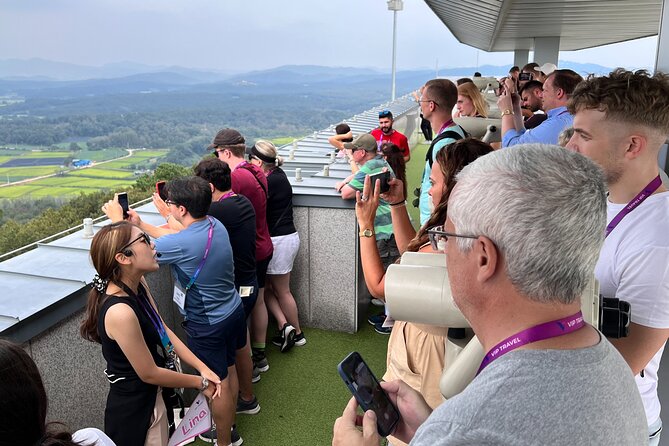
Dora Observatory: closest views over North Korea, with limits
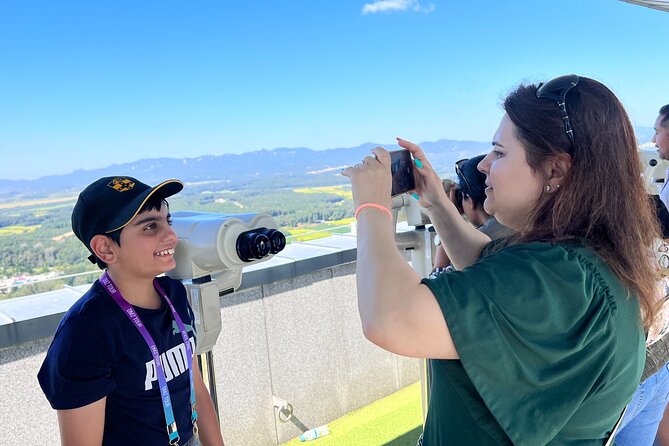
After the tunnel, you’ll visit Dora Observatory, perched at Dorasan, rebuilt in 2018 and established in 1986. It’s South Korea’s closest vantage point over North Korea, which is exactly why it’s such a bucket-list stop.
But keep your expectations grounded. Even with a good location, the peninsula distance remains a factor. Some visitors point out you may still feel far from what you’re trying to see, so don’t come expecting to pick out fine details. What you’re really getting is a change in perspective: the border doesn’t feel theoretical anymore.
Weather also plays a big role. If it’s rainy or hazy, visibility drops and your “wow” factor might soften. The good news: a strong guide can still make the visit satisfying by tying what you see to the broader border story and the facilities around Dorasan.


Imjingak Park memorials: small stops that do heavy emotional work

Between the major moments, the tour includes several short memorial stops in Imjingak Park:
- Mangbaedan Memorial Altar: a place for families honoring loved ones believed to be trapped in North Korea. This is brief, but the context makes it hit.
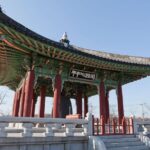
- Pyeonghwauijong Peace Bell: a large bronze bell forged in 2002 as a symbol of reunification. You’ll stand in front of it, and the size gives you a sense of intention: this is public hope built into steel and sound.
These stops aren’t about big crowds or long walks. They’re about giving your head and heart time to catch up after the shock of the tunnel.
Optional peace-and-a-view time: Tongilchon Jangdankong Maeul
One stop you shouldn’t skip if you like calm atmosphere is Tongilchon Jangdankong Maeul, a village area near the Civilian Control Line. It’s positioned as a place where the environment is relatively well preserved and the tour wraps up the DMZ story with something steadier and more grounded.
Even if you only have 30 minutes, the value is that it shifts the day’s tone. After structured border history, you get a softer landing back toward normal life—still on the edge of the line, but human-scale.
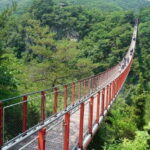
Red Bridge Rush: Gamaksan Red Bridge is not for everyone
The tour title promises the Red Bridge, and you’ll see it as Gamaksan Suspension Bridge, sometimes referred to as the Gloucester Heroes Bridge. This part is explicitly optional and runs about an hour.
The key consideration: people who are not used to steep uphill walking can struggle. One description calls the hike to the top very steep, with limited time to make the climb. If your legs are okay with a determined uphill push, it’s a great payoff. If they’re not, this is the stop to plan carefully or consider skipping.
Also, the bridge is narrow (the itinerary notes about 1.5 meters wide). That’s part of the thrill, but it’s not the place to feel rushed or unsteady. I’d treat it as a “get there, breathe, walk carefully, then enjoy” moment, not a casual stroll.
Which guides make this tour shine (names people keep mentioning)
A DMZ day lives or dies on the guide’s ability to translate complicated history into human terms without rushing. Based on the standout names that often come up for this tour, you may hear guides like Nancy, Henry, Crystal, Judy, Kelly, Lina, Sunny, Gabby, K (유옥경), and Yu Jin.
What these guide names have in common in people’s experiences: clear explanations, good timekeeping, and keeping the mood upbeat even on rainy or slow days. If you’re choosing among departure times, that matters less than your readiness for the physically demanding parts—but it does matter for making the day feel coherent.
What to pack and how to pace yourself
This is a full-day trip with structured stops, not a casual wandering day. Pack for comfort and rules.
Bring:
- Your passport (required on tour day). Military ID Cards and locally issued ARC cards are accepted.
- Walking shoes with grip for the tunnel route and the Red Bridge option.
- A light snack. Lunch isn’t included, and while you may be able to buy food at stops, you don’t want hunger to turn the tunnel into a bad memory.
- Binoculars if you own them. Distance to North Korea can be a factor from the observatory, and having binoculars can make the viewpoint more satisfying.
Pace:
- Don’t spend extra energy fighting the schedule. The tour is time-managed by clearance and access.
- Save your strongest energy for the tunnel and the Red Bridge option.
Who should book this DMZ + Third Tunnel day
This is a strong fit if you:
- Want a guided DMZ day without figuring out complicated transport on your own.
- Are most interested in the Third Tunnel as the main event.
- Like history that connects directly to places you can stand in.
- Can handle walking time and at least one strenuous segment.
It may be a poor fit if you:
- Have limited mobility or struggle with steep climbs and confined spaces.
- Expect lots of sightseeing that feels relaxed or scenic throughout the day.
- Need frequent photo opportunities at every stop (tunnel photography is restricted).
Families can go, but treat this as an active day, not a gentle museum visit.
Should you book this tour
Book it if you want a well-packaged DMZ day from Seoul with admissions included, professional guiding, and a route that hits the most emotionally and historically powerful stops: Imjingak, the Third Tunnel, and Dora Observatory. It’s good value for what you actually get.
Skip it or plan differently if you’re vulnerable to strenuous walking. The tunnel can be demanding, and the Red Bridge hike is steep with limited time. If you’re unsure, you can likely make the bridge optional choice on the day, but you still need to be okay with the tunnel segment.
If your travel dates are flexible, aim for a time when you expect decent weather. Rain doesn’t ruin the entire day, but it can affect how much you see from Dora Observatory and how comfortable the walking feels.
In short: this is a meaningful, structured day that trades leisure for access and understanding. If you’re prepared for movement and rules, it’s one of the best ways to experience the DMZ area in a single outing.
FAQ
How long is the DMZ tour?
It runs about 7 hours 30 minutes (approx.), including transportation and all scheduled stops.
Where do I meet for pickup?
You can meet at Myeongdong Subway Station Exit 9, Seoul City Hall Subway Station Exit 6, or Hongdae Subway Station Exit 3. Hotel pickup may be available only in the downtown area or at a main subway station.
Do I need a passport?
Yes. You need a passport on the tour day. Military ID Cards and locally issued ARC cards are also accepted.
Is lunch included in the price?
No. Lunch isn’t included, so plan for snacks or food purchases at stops.
Can I take photos inside the Third Tunnel or from the observatory toward North Korea?
Photos inside the DMZ tunnel are not allowed. For the observatory, photos of North Korea may not be possible as expected due to distance and viewing limits.
Is the Red Bridge part optional?
Yes. The Gamaksan Suspension Bridge (Red Bridge) is optional and included as an additional stop with about an hour allotted.

![[Perfect Private Tour] Nami island, Petite France and Organic Strawberry Farm - Price and Logistics: What You Pay For (and What You’ll Add)](https://m.discoveringseoul.com/wp-content/uploads/perfect-private-tour-nami-island-petite-france-and-organic-strawberry-farm-400x267.jpg)