REVIEW · SEOUL
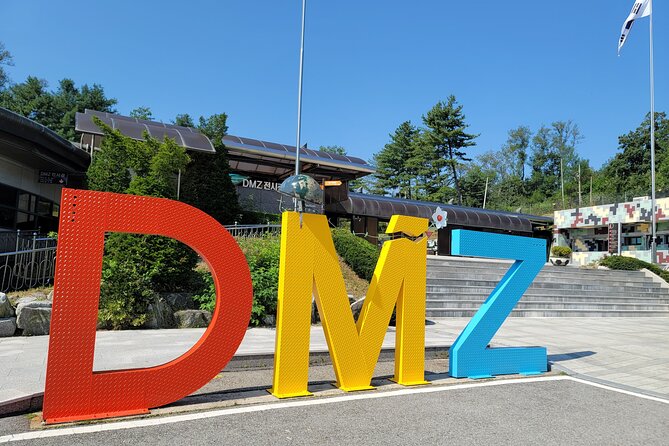
Insightful DMZ Tour by Expert opt. Suspension Bridge with Pickup
Book on Viator →Operated by Here Korea Travel · Bookable on Viator
A border that shouldn’t exist. This DMZ tour takes you out of Seoul and into the parts of South Korea you can’t access without a guide, with time at Imjingak Peace Park and a close-up visit to the Third Tunnel. It’s history you can see with your own eyes, not just read on a screen.
I especially like the round-trip transport option from Seoul, which saves you from renting a car or playing timetable roulette. And you also get practical viewing tools: free binoculars/monoculars for spotting North Korea when you reach Dora Observatory, plus clear explanations from guides such as Joo-Ee, Vincent, and Jung.
The one thing to plan for: this day is physically demanding. The tunnel visit involves a steep climb back up and crouching in a low space (people describe it around 5 feet tall), so pack accordingly and don’t pretend it’s a stroll.
In This Review
- Key things to know before you go
- Why this DMZ route starts at Imjingak Peace Park
- The Imjingak stops you’ll actually remember
- Entering the DMZ: Third Tunnel and Dora Observatory in one day
- The DMZ viewing time
- The Third Tunnel: the part that tests your legs and patience
- Dora Observatory: where your viewing actually clicks
- Remembering separation: Mangbaedan and the “civilian control” stops
- Optional Gamaksan Chulleong Suspension Bridge: the walking payoff
- Timing, transport, and where you’ll end up in Seoul
- What to pack (so the tunnel doesn’t ruin your day)
- Value check: is $53 good for a DMZ day?
- The guide quality factor: why names keep coming up
- Should you book this DMZ tour?
- FAQ
- FAQ
- Do I need a passport for this tour?
- How long is the DMZ tour?
- Is hotel pickup included?
- What DMZ sites are included?
- Is the suspension bridge stop included?
- Are binoculars or monoculars provided?
- Where will I be dropped off in Seoul?
- Is the tour physically demanding?
Key things to know before you go
- Guided access to the DMZ sites you can’t reach on your own
- Imjingak Peace Park first, with historic stops like the Bridge of No Return area
- Third Tunnel entry, including the physical challenge of going down and back up
- Dora Observatory + binoculars/monoculars, built for real viewing of the North Korean side
- Optional Gamaksan Chulleong Suspension Bridge, weather-dependent and best if you like walking
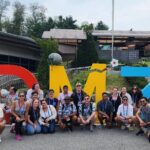
- Small-group feel capped at 40, with guides praised for pacing and English
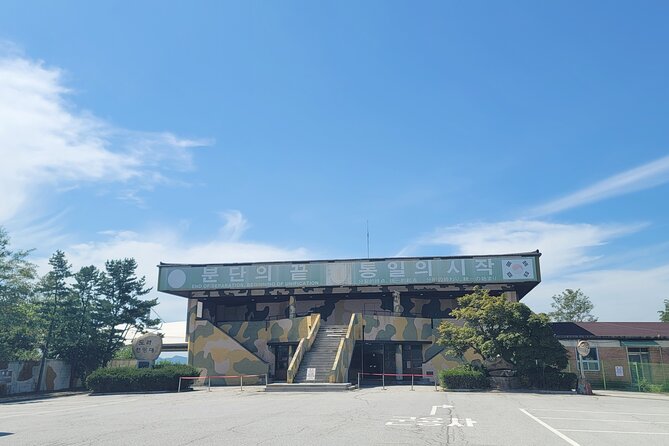
Why this DMZ route starts at Imjingak Peace Park
Most DMZ tours are built around the same headline stops, but what makes this route feel more coherent is the start at Imjingak Peace Park. You begin at a tourist information center that’s basically the hub for DMZ-day logistics, and then you’re guided through the memorial geography of the area—derailed equipment from the Korean War, prisoner-exchange history referenced around the Bridge of No Return, and the kinds of viewpoints that set the emotional tone before you ever reach the actual DMZ line.
I like this “warm-up” because it saves you from feeling lost when you later hear details about the Korean War’s aftermath. Instead of jumping straight to the dramatic photo stops, you get context first: why this park exists, how people relate to the divided peninsula, and what the park is trying to remember.
This is also a practical advantage. Imjingak is where you’ll get oriented, meet up with your guide’s instructions, and figure out what you need for the later walking and viewing. If you’re the type who hates being confused, you’ll appreciate that structure.
You can also read our reviews of more tours and experiences in Seoul.

The Imjingak stops you’ll actually remember

Imjingak is more than a waiting area. Your guide helps you connect each spot to the bigger story, and the time you spend here is long enough to feel meaningful (about half an hour just to get settled at the information center, then more time exploring the park).
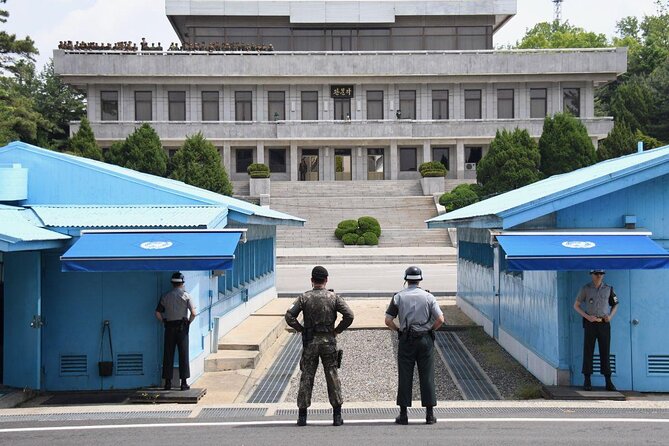
You’ll walk through areas that reference the Korean War and the human costs that followed—like the setting tied to separated families. There’s also a stop area where your guide talks about the Bridge of Freedom before you head into the restricted area. It’s brief (just minutes), but it acts like a hinge: history and remembrance on one side, the DMZ experience on the other.
One thing I’d encourage you to do if you have a short window while waiting: look for the North Korea Experience shop located at the lower level of the viewing platform area. People describe it as a quick, worthwhile stop to learn about what life is like for North Koreans—small time investment, big payoff for understanding what you’re seeing later.
Also, if you notice a small shop near the Truman memorial selling North Korean currency and stamps, that can be an easy add-on. It’s not the main event, but it’s a neat way to bring the day home.
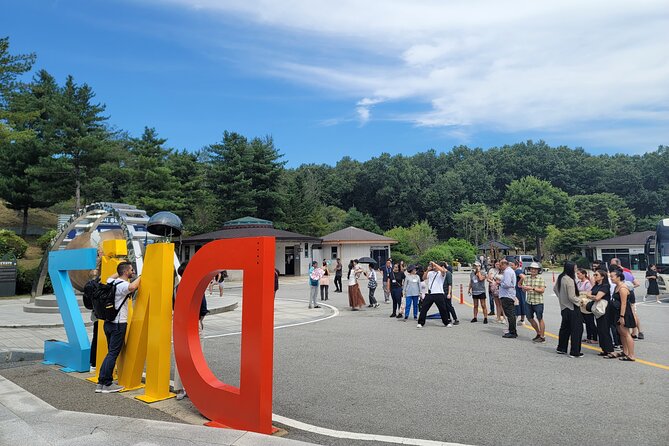
Entering the DMZ: Third Tunnel and Dora Observatory in one day
This is the heart of the trip, and it runs on a clear rhythm: you go to the DMZ area, then to the tunnel, then to Dora Observatory for the best sighting chances.
The DMZ viewing time
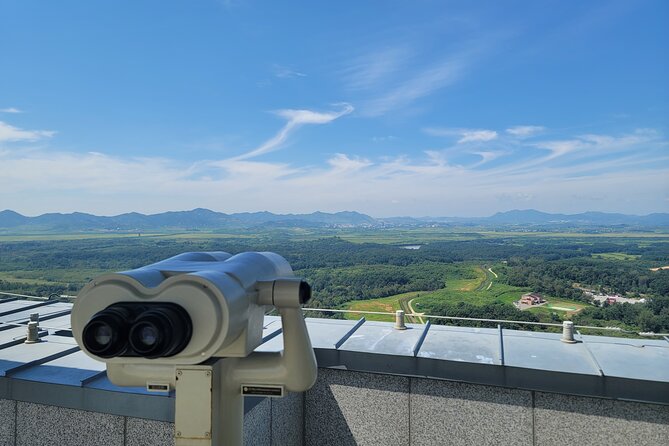
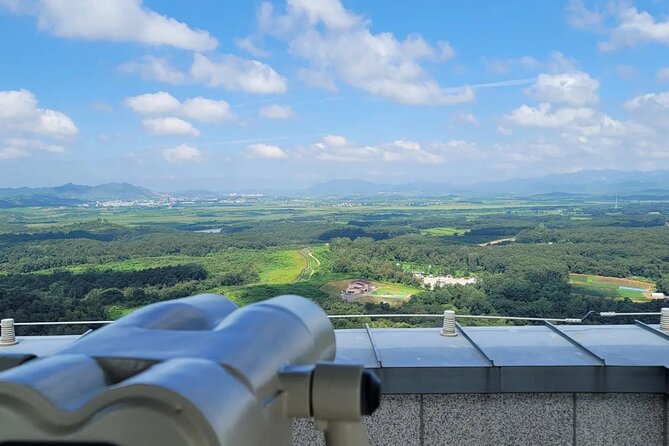
Once you reach the DMZ segment (around two hours total at this stage), your guide points out what you can see and how to interpret it. The tour includes time at major DMZ points such as the Dora Observatory for seeing North Korea, and it also references Gaeseong (noted as the third-biggest city in North Korea in the tour description). You’ll use binoculars/monoculars provided for North Korea viewing, which matters because the viewing distance is the whole point. Without that, Dora can feel like a distant blur.
One practical note: photo rules can be strict in some DMZ-adjacent zones. I can’t promise what every operator allows or every day’s enforcement looks like, but plan your expectations that you may have limited ability to take photos and rely more on your guide’s explanations.
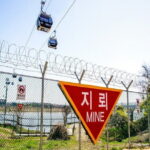
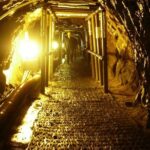
The Third Tunnel: the part that tests your legs and patience
Then comes the Third Tunnel. This is an infiltrational tunnel dug by North Korea after the Korean War, and you can actually get inside it. What makes it memorable is also what makes it exhausting: the climb down and the walk back up. People describe it as a haul, with an uphill return and a low tunnel height that forces you to crouch or stoop.
If you want the tunnel experience without regrets, wear shoes you can move in and accept that it’s not the kind of stop you can rush. This is where your stamina matters more than your speed. Your guide will keep you on pace, but the tunnel is still a physical bottleneck.


Dora Observatory: where your viewing actually clicks
Dora Observatory is where binoculars/monoculars pay off. The tour includes time there (around 30 minutes), and it’s framed as a spot where you can see North Korea with your naked eyes and also use binoculars to spot soldiers and people across the DMZ. You also get a view toward Gaeseong referenced in the tour description.
If you’re the type who likes to understand what you’re seeing, Dora is a great stop because your guide can help you read the view. If you’re just chasing photos, it may feel a bit slower than you want—but the binocular viewing is what turns it from vague to real.
Remembering separation: Mangbaedan and the “civilian control” stops
A DMZ day can turn into a checklist if you’re not careful. What keeps this one from feeling cold is the inclusion of places tied to families separated after the war.
Mangbaedan is one such stop, described as where separate families can visit, missing North Korea and their hometowns. It’s short (around 10 minutes), but it lands because you’ve already seen the tunnel and the cross-border observation logic. Suddenly, it’s not only about geography—it’s about people trying to stay connected through a system designed to keep them apart.
The tour also includes a stop at Tongilchon-gil, described as an actual village in the Civilian Control Zone, with locals living there. You’ll have time there as a rest stop before returning to Imjingak by a government-run coach, plus a chance to pick up a souvenir or handle small needs.
To be clear, this isn’t a long “walk around and chat with locals” moment. It’s a guided, time-limited viewpoint stop inside a controlled zone. Still, it’s valuable because it adds a layer to the day: you see the concept of living near the border rather than only visiting monuments and observation points.
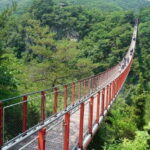
Optional Gamaksan Chulleong Suspension Bridge: the walking payoff
The suspension bridge stop is optional. If you add the DMZ + Suspension Bridge choice, you’ll visit Gamaksan Chulleong Bridge, also called the Gamaksan Chulleong Bridge. It’s a suspension bridge at Mt. Gamaksan, and the tour ties it to fierce battlefield conditions during the Korean War.
The upside is scenery: you’re walking in a forested area and getting a breath of air after the tunnel. People describe the bridge as spectacular, but the bigger point is the value for your time. It turns the day from “mostly intense and restricted” into “history plus a reset for your body and eyes.”
The catch is the walk. Even without the bridge itself, the whole DMZ day is a leg workout. One reason this bridge gets love is because it feels like a reward for surviving the tunnel logistics.
The other catch: weather matters. This experience requires good weather, and if conditions are poor, you may not be able to do the bridge. In at least one rain scenario, the suspension bridge didn’t happen, and the day still went on with an alternate unification-related observatory stop (Odusan Unification Observatory was mentioned in one account). I’d plan flexibility and pack like it might rain.
Timing, transport, and where you’ll end up in Seoul

This tour runs about 6 to 10 hours. That range makes sense because the day depends on how long you spend at each controlled stop, plus what the weather does to the optional bridge.
You also get some built-in convenience that matters in Seoul: pickup is optional, and you’ll be dropped off at locations like Hongdae, Myeongdong, Gwangjang market, and Dongdaemun. Those are handy neighborhoods if you want a seamless transition into street food, shopping, or an evening outing.
The day is scheduled so you’re back to Seoul the same day in most cases (one account described being back around 3pm after an early start). The bigger takeaway: treat this like a full-day commitment, not an afternoon side quest. Start early, expect walking, and plan dinner close to your drop-off.
What to pack (so the tunnel doesn’t ruin your day)
Based on the consistent feedback from people who did the hardest part, here’s the practical approach: treat the tunnel like a workout and plan for the bridge like a scenic hike.
Wear:
- Comfortable shoes with good grip
- Clothes you can move in while crouching or stooping
Bring:
- A light layer in case it’s chilly or drizzly in the morning
- A water bottle if you’re able to buy along the way (your tour description encourages personal expenses)
- Snacks if you think you’ll need them
For the tunnel specifically, people describe the height as around 5 feet. That means lots of crouching and bent-over walking to the end and then back out. If you rush it, you’ll feel worse. If you slow down and use your guide’s pacing cues, it’s still hard, but it stops feeling like a surprise ambush.
Also, bring your passport. A current valid passport is required on the day of travel.
Value check: is $53 good for a DMZ day?
At $53 per person, this tour is priced like a value-focused DMZ day rather than a luxury experience. Whether it feels like a great deal comes down to what you compare it to.
Here’s what the price includes:
- DMZ entrance fees
- An experienced guide
- Air-conditioned vehicle
- Free rental of monocular or binoculars
- Optional hotel pickup (round-trip transport from Seoul is the point)
- Guided stops at the core DMZ sites (including the Third Tunnel and Dora Observatory)
What’s not included:
- Personal expenses
- Hotel drop-off (you get drop-offs in central areas like Hongdae/Myeongdong rather than a precise hotel return)
So the math works best if:
- You want an organized day with guided access
- You don’t want to negotiate transport logistics on your own
- You care about the viewing setup (binoculars/monoculars) and explanations that help you interpret what you’re seeing
If you’re comparing against a cheaper DIY plan, the DMZ access itself is the barrier. That’s why a guided day like this tends to feel worth it.
The guide quality factor: why names keep coming up
One of the most praised parts of the day is the guiding—especially English clarity and pacing. Names that came up in strong accounts include Joo-Ee, Vincent, Jung, Jake, Jeannie, Jones, and Yujin.
What that means for you in plain terms:
- You’ll get history explained in a way that helps the sights make sense.
- Guides often bring extra support for viewing (for example, binocular help and instructions on where to look).
- The tour flow tends to be kept on track, which matters because you’re operating on a schedule where you can’t linger forever.
If you’re worried about understanding details, this is the part you can trust more than you can trust the weather forecast.
Should you book this DMZ tour?
I’d book it if you want a structured, guided DMZ day that goes beyond headlines. This one gives you the main trio—Imjingak Peace Park context, Third Tunnel, and Dora Observatory—plus the human and remembrance side with Mangbaedan and civilian-control-zone stops like Tongilchon-gil. The optional Gamaksan Chulleong Bridge is a solid bonus if you’re up for more walking.
I’d think twice if:
- You have mobility limitations or you know you struggle with steep climbs and crouching (the tunnel is the stress test)
- You’re going at a time when you expect bad weather, since the suspension bridge may not be possible
If you go in with the right mindset—comfortable shoes, passport ready, and acceptance that this is a serious day—this tour is one of the more straightforward ways to experience the DMZ without wasting time figuring it all out yourself.
FAQ
FAQ
Do I need a passport for this tour?
Yes. A current valid passport is required on the day of travel.
How long is the DMZ tour?
The duration is listed as about 6 to 10 hours.
Is hotel pickup included?
Hotel pickup is optional. The tour includes hotel pickup only if you select it, and you should check the Viator message for the pickup time information.
What DMZ sites are included?
The tour includes time at Imjingak Peace Park and DMZ stops such as the Third Tunnel and Dora Observatory, plus other nearby sites like Mangbaedan and the Bridge of Freedom area.
Is the suspension bridge stop included?
The Gamaksan Chulleong Bridge stop is optional. It’s available when you choose the option that combines DMZ with the suspension bridge.
Are binoculars or monoculars provided?
Yes. There is free rental of monocular or binoculars.
Where will I be dropped off in Seoul?
Drop-offs are listed as Hongdae, Myeongdong, Gwangjang Market, and Dongdaemun.
Is the tour physically demanding?
Yes. It requires moderate physical fitness. The tunnel visit can be challenging, especially the down-and-up ramp and the need to crouch due to a low tunnel height.