REVIEW · SEOUL
Gyeongbokgung Palace Photo Session with your own phone
Book on GetYourGuide →Operated by seoul trip snap · Bookable on GetYourGuide
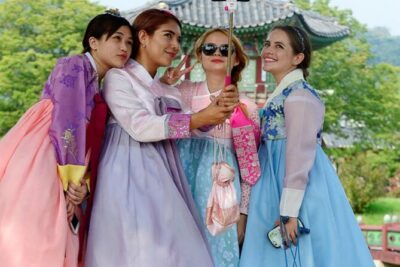
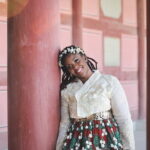
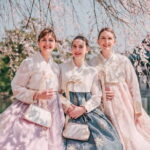
Gyeongbokgung looks different when you’re dressed for it. In this 1-hour photo walk, you explore Joseon-era palace grounds in a hanbok and get both posed and candid shots taken with your own phone or camera. I love the combination of real portrait guidance (pose, framing, background) and the fact that you’re not waiting on deliverables. The main catch is that hanbok rental and palace entrance fees are not included, so you’ll want to plan for that if you don’t already have a hanbok.
Meet Iman (often listed as Imane) near Gyeongbokgung Station Exit 4, wearing a jeans hat and with dark brown hair. She’s patient and gives clear direction, which is exactly what you want when you’re juggling walking, timing, and getting your best angles. One consideration: you’ll do most of this on foot, so comfortable shoes matter, especially if the weather is warm or you get stuck in crowds.
In This Review
- Key Things That Make This Photo Session Worth Your Time
- Why This Beats Random Selfies at Gyeongbokgung
- Price and Value: Is $36 Actually a Good Deal?
- Meeting at Gyeongbokgung Station Exit 4 (and What to Do Before You Arrive)
- What Happens During the 1-Hour Walk Inside the Palace
- 1) Quick setup and orientation
- 2) Pose practice that feels natural
- 3) Portrait moments at beautiful palace spots
- 4) Candid shots as you explore
- How the Guide’s Posing and Framing Tips Show Up in Your Photos
- Using Your Phone or Camera Like a Pro (Without Becoming One)
- Hanbok, Entrance Fees, and the Practical Stuff You Should Plan
- Photo Spots at Gyeongbokgung: What You’ll Likely Capture
- Who This Is Best For (and When You Might Skip It)
- What You’ll Take Home
- Should You Book This Gyeongbokgung Photo Session?
- FAQ
- What’s the duration of the Gyeongbokgung photo session?
- Where do we meet for the session?
- Is hanbok rental included in the price?
- Are entrance fees included?
- Can the photos be taken with my phone?
- Does the guide help with posing and composition?
- What languages are available?
Key Things That Make This Photo Session Worth Your Time
- Your own phone or camera does the capturing, so you control what you share right away
- Iman’s posing tips help you look natural, not stiff or awkward
- Guided route through the most photogenic palace areas so you’re not guessing where to stand
- Framing and background assistance keeps your shots from turning into random crowds and clutter
- Hanbok vibe + Joseon-era architecture make the photos feel timeless, not touristy
- English, French, Arabic, Korean support makes the instructions easy to follow
Why This Beats Random Selfies at Gyeongbokgung
If you’ve ever tried to take a great photo at a major palace, you know the problem: the place is gorgeous, but you get stuck thinking about your camera instead of enjoying the moment. This session fixes that. You’re walking the grounds anyway, but a guide is steering you toward photo-ready spots and telling you what to do with your body and your lens.
I also like how it’s not just “stand here and smile.” You get both portraits and candid-style shots, so the final set can include those classic palace backgrounds and the in-between moments that feel more real. And because it’s done with your own phone, you’re not stuck waiting for someone else to transfer files, edit timelines, or figure out where your pictures went.
The palace setting helps too. Gyeongbokgung is all Joseon-era architecture, layered gates, courtyards, and traditional rooflines. When you add hanbok, the whole look becomes cohesive. You’re not just photographing the site—you’re performing a little piece of the story.
You can also read our reviews of more photography tours in Seoul
Price and Value: Is $36 Actually a Good Deal?
$36 per person sounds simple, but here’s why it can be good value. For that price, you’re paying for an hour of guided portrait coaching plus someone actively taking photos with your device while you focus on looking good and exploring.
If you try to recreate this yourself, you usually end up with one of these outcomes:
- You get photos where you’re the photographer and not the subject.
- You get shots that are technically fine but look awkward because you didn’t know where to stand or how to pose.
- You waste time asking strangers to shoot, then you’re back to reviewing blurry attempts.
This session solves the setup and the posing. You’ll also be guided on framing and background so the final pictures match the palace aesthetic. Even if you consider a standard photo-tour as “just walking,” this one has a photo purpose built in, not an afterthought.
One thing to budget around: hanbok rental is not included, and entrance fees are only free if you’re wearing a hanbok. So if you need to rent, factor that into your total plan.
Meeting at Gyeongbokgung Station Exit 4 (and What to Do Before You Arrive)
You’ll meet right in front of Exit 4 at Gyeongbokgung Station. Iman will be wearing a jeans hat and has dark brown hair. She notes she might not look Korean, but she is—so don’t be shy about introducing yourself.
This meeting point matters because it gets you into the flow fast. You’re not spending the first part of the hour hunting for each other or trying to locate the right gate. If you arrive early, use that time to check your phone settings:
- Turn off notifications (so your screen doesn’t keep waking up during shooting).
- Clear a bit of storage if you’re close to full.
- Confirm you can see your camera preview clearly in bright outdoor light.
I also recommend taking one quick test photo at the palace entrance area before you start. Not to obsess, just to check that your camera is focusing properly on faces.
What Happens During the 1-Hour Walk Inside the Palace
This experience is structured like a guided photo walk, not a lecture and not a long studio session. You’ll return to the meeting point at the end, so you’re not stuck commuting with your camera gear afterward.
Think of the hour in four phases:
1) Quick setup and orientation
Before you start moving through the grounds, you’ll get direction on what to do with your phone or camera. The guide helps you get into a comfortable rhythm quickly, which is key because palace photos often depend on timing and light.


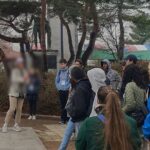
2) Pose practice that feels natural
A big part of the value is learning how to pose without freezing. You’ll get guidance so you don’t just stand there doing the classic stiff smile. Instead, you’ll get simple adjustments that make a difference:
- where to angle your shoulders
- how to hold your hands and body for a flattering look
- how to keep your face relaxed while still looking engaged
The goal is to help you look like you belong in the scene, especially with hanbok in frame.
3) Portrait moments at beautiful palace spots
As you move around the grounds, the guide leads you to places with strong backgrounds and good visual structure. This is where the palace architecture does the heavy lifting—layered roofs, traditional walls, and wide courtyards give you that Joseon-era look without needing fancy staging.
You’ll get professional-style portraits taken with your own phone, which is great if you like the idea of a real photoshoot but don’t want to rent equipment or hire a stranger to guess your best angles.
4) Candid shots as you explore
Between portrait stops, you’ll also get candid shots. This is where you look less posed and more like you’re actually enjoying the day. The guide can also help with timing and composition so you don’t end up with backgrounds full of distractions.
At the end, you’re back at the meeting point, and you leave with a phone full of images you can share quickly.
How the Guide’s Posing and Framing Tips Show Up in Your Photos
The best part of this style of session is that you don’t have to be “photo-ready” when you start. You just need to follow the guidance. From recent feedback, Iman’s thing is being friendly, patient, and encouraging—which matters because most people don’t feel confident in front of a camera.
What you’ll actually notice in the pictures:
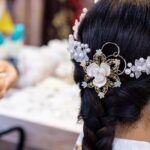
- Your outfit looks intentional, not accidental. Hanbok styling can look great, but only if your posture and angle work with it.
- Your background looks clean and controlled. Framing and background assistance means you’re less likely to end up with random clutter ruining the shot.
- You get variety. Portraits show the classic look; candid shots show movement and personality.
Even if you’re not used to being photographed, pose coaching tends to reduce that awkward “What do I do with my face” feeling. It also speeds things up, which is useful at popular sights.
Using Your Phone or Camera Like a Pro (Without Becoming One)
You’re using your own device, which means you keep control. You also avoid the stress of borrowing someone else’s gear, dealing with transfers, or figuring out unfamiliar equipment.
To get the most out of the session:
- Charge your phone fully before you go.
- Bring enough space for lots of photos. A one-hour shoot can still generate a lot of images.
- Wear comfortable shoes. Even if it’s “only” an hour, the palace grounds include walking and turning.
If you use a camera instead of a phone, it’s still fine. The experience is designed for either. Just make sure your camera is ready to go and you’re comfortable handling it while moving.
If you want a simple hack: turn your phone to the rear camera (usually) and keep your hands steady. Your guide is taking the pictures, but you still want your device settings to be consistent so the camera doesn’t behave oddly.
Hanbok, Entrance Fees, and the Practical Stuff You Should Plan
Hanbok rental is not included in the $36 price. That doesn’t make the experience bad—it just means the photo session and the costume are separate pieces of your day.
The good news: entrance is free if you’re wearing a hanbok. So if you’re renting one anyway, that could offset part of the total cost. If you’re not, entrance fees may apply.
Also remember: if you rent a hanbok, you’ll want time to get dressed and adjust the fit. The photo session is an hour, so arriving “right when you should” matters. Give yourself a buffer so you’re not rushing at the meeting point.
Photo Spots at Gyeongbokgung: What You’ll Likely Capture
Even without naming every exact corner, you can expect the guide to steer you toward the palace’s strongest visual features—wide traditional spaces, classic architectural backdrops, and areas with clear lines and textures. Those are the places that make Gyeongbokgung photos look like a real scene, not just a photo of a building.
Here’s what typically makes a spot work for photos:
- Clean lines for strong portrait framing
- Courtyards or open areas that give you depth behind you
- Traditional surfaces that look good even in daylight
- Backgrounds that don’t get swallowed by harsh modern signage
Your guide also helps with framing and background, so if a spot is crowded at the moment, you’re not stuck. You’ll adjust and keep moving without turning the hour into a stressful waiting game.
Who This Is Best For (and When You Might Skip It)
This works especially well if you:
- want hanbok photos but don’t want a full production or complicated planning
- like the idea of candid shots plus polished portraits
- want an easy win for social sharing, without delays
- feel awkward posing and want someone to guide you step by step
It might be less ideal if you’re expecting a long, slow cultural tour. This is focused on photos and the photo walk, not extended explanations of palace history.
And if you hate walking, plan for it. It’s only an hour, but you’re moving around the grounds.
What You’ll Take Home
You leave the session with a phone full of gorgeous pictures you can share with friends right away. That “instant usability” is a big deal. You don’t have to wait for downloads, file transfers, or a lengthy turnaround.
From the feedback, people consistently praise how naturally the guide captured them and how the results felt worth the fee. One guest specifically noted the guide’s patient approach and the photos being exactly the kind they wanted to keep.
Should You Book This Gyeongbokgung Photo Session?
I’d book it if you want high-quality hanbok photos without the usual hassle. For $36, you get a tight, guided hour that solves the biggest problems: awkward posing, random backgrounds, and not knowing where to stand.
You should be ready for a couple of planning realities:
- Bring comfortable shoes because you’ll be on your feet.
- Budget for hanbok rental if you don’t already have one.
- Make sure your phone is charged and has storage.
If your goal is practical: leave with a set of images that look professionally composed and still feel like real moments, this is a smart use of time at Gyeongbokgung.
FAQ
What’s the duration of the Gyeongbokgung photo session?
The photo session lasts 1 hour.
Where do we meet for the session?
You meet in front of Exit 4 at Gyeongbokgung Station. The session ends back at the meeting point.
Is hanbok rental included in the price?
No. Hanbok rental is not included.
Are entrance fees included?
Entrance fees to Gyeongbokgung are not included, but entrance is free if you are wearing a hanbok.
Can the photos be taken with my phone?
Yes. Professional-style portraits and candid shots are taken with your own phone or your camera.
Does the guide help with posing and composition?
Yes. You get tips for natural posing plus assistance with framing and background.
What languages are available?
The session is available in English, French, Arabic, and Korean.